Ready to defy gravity and master the art of handstands? Whether you’re a seasoned yogi looking to elevate your practice or a beginner eager to flip your world upside down, learning how to do a handstand is an exhilarating journey that challenges both body and mind. Get ready to strengthen your core, improve balance, and boost confidence as we dive into the step-by-step guide on perfecting this impressive inversion. Let’s take your fitness routine to new heights – literally!
How to Do a Handstand? – A Step by Step Guide
Warm-Up
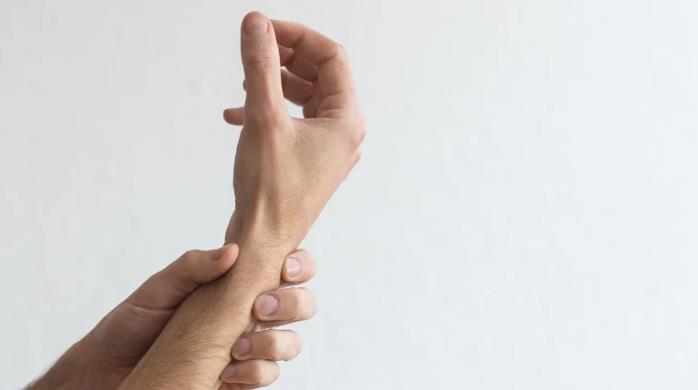
Before attempting a handstand, it’s crucial to prime your body with a thorough warm-up routine. Focus on loosening up those wrists that will bear the weight of your entire body during the inversion. Start with gentle wrist stretches, moving them in various directions to increase flexibility and reduce the risk of strain.
Next, pay attention to your shoulders – the powerhouse behind stability in a handstand. Perform shoulder rotations to improve mobility and prevent injuries while upside down. Engage your core muscles through activation exercises like planks or leg raises; a strong core is essential for maintaining balance and control during the handstand.
Don’t forget about your legs – they play a vital role in supporting your body weight as you kick up into the inversion. Incorporate leg stretches and dynamic movements to ensure they’re primed for action when it’s time to go vertical.
Wall Support

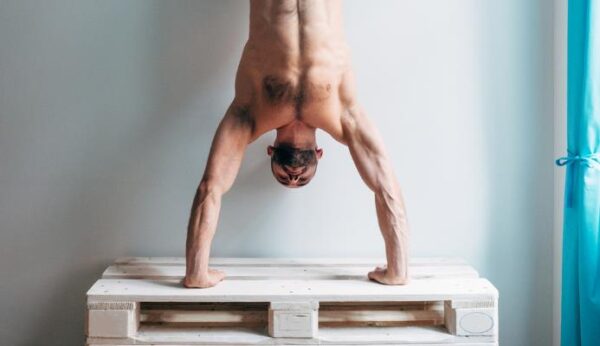
When it comes to mastering the handstand, starting with wall support can be a game-changer. Begin by positioning yourself a few inches away from the wall, planting your hands firmly on the ground shoulder-width apart.
With fingers spread wide and arms locked out straight, kick up gently—one leg at a time—until your heels make contact with the wall behind you. Focus on maintaining a straight line from your wrists through to your ankles, engaging that core for stability.
As you find yourself in this supported handstand position, remember to breathe and concentrate on pressing through your palms into the floor. Your body alignment is crucial here, so keep those shoulders stacked over your wrists while ensuring your hips and ankles are vertical.
Use this wall support as an opportunity to build strength in your shoulders and core. Embrace the challenge of finding balance within this controlled environment before venturing into freestanding handstands.
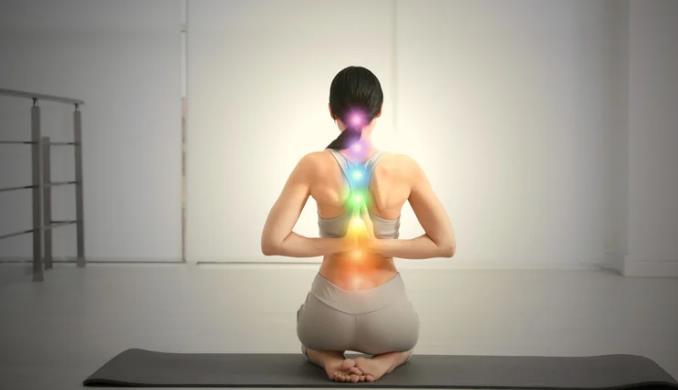
Balance and Alignment
When it comes to mastering the handstand, balance, and alignment are crucial elements. Picture a straight line running from your shoulders hips all the way down to your ankles – that’s the alignment goal. Engaging your core is like having an internal stabilizer; it keeps everything in check.
Your gaze acts as a steering wheel in this balancing act – fixate between your hands. It helps you stay centered and aids in maintaining equilibrium. Think of it as your North Star guiding you through the stance.
Stacking those key body parts vertically isn’t just about aesthetics; it’s about functionality, too. It’s like building a sturdy human Jenga tower – each piece supporting the other for stability
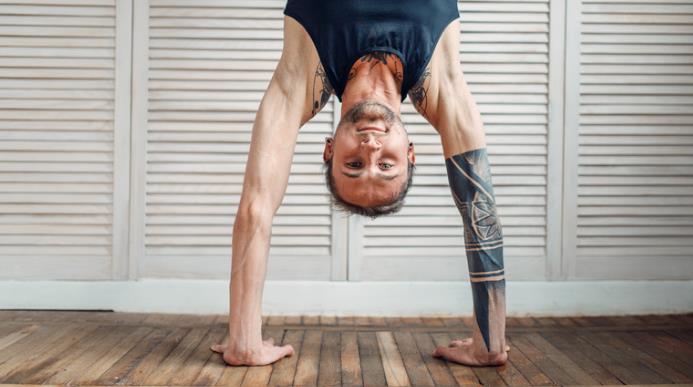
Kick-Up Technique
Ready to take your handstand practice to the next level? Let’s talk about the kick-up technique – the key to mastering a freestanding handstand!
Start by standing tall with your arms reaching overhead, preparing yourself for the exhilarating challenge ahead. It’s time to shift your weight forward ever so slightly and engage those core muscles.
As you kick one leg up gracefully, feel the power in your hands pushing off the ground, propelling you upwards. Embrace the momentum as you smoothly bring your other leg up towards the sky.

The goal? To achieve that perfect alignment wher,e your hips are stacked over your shoulders, creating a beautiful straight line from head to toe. It’s all about balance, control, and finesse.
With dedication and practice, this dynamic movement will become second nature. Keep refining your technique and embracing each attempt as a step closer to achieving that flawless freestanding handstand!
Spotting
Having a spotter when you’re just starting with handstands can make a world of difference. They offer that extra support and reassurance as you work on conquering your fear of going upside down.
A spotter’s role is crucial in providing guidance, whether it’s holding your legs to help stabilize you or giving verbal cues to adjust your form while kicking up into the handstand position.
Their presence can give you the confidence boost needed to push past any mental barriers that may be holding you back from fully committing to the movement. It’s like having a safety net there to catch you if things don’t go as planned.
Remember, even seasoned practitioners benefit from spotters at times. Having someone there watching out for your safety allows you to focus on perfecting your technique without worrying about falling over.
Practice Regularly
Consistency is key when it comes to mastering handstands. Regular practice will not only help you build strength but also improve your balance and body awareness. Incorporating handstand drills and exercises into your workout routine is essential for progress.
Start by setting aside dedicated time each day to work on your handstand skills. Whether it’s a few minutes or a full session, staying consistent will yield results over time.
Focus on strengthening your core muscles, as they are crucial for stability during handstands. Incorporate exercises like planks, hollow holds, and leg raises to enhance your overall strength.
Practice various drills that target specific aspects of the handstand, such as alignment, shoulder stability, and kicking up technique. Each drill serves a purpose in enhancing different elements of your handstand practice.
Remember, progress takes time, so be patient with yourself throughout the journey. Celebrate small victories along the way and stay committed to honing your skills through regular practice sessions.
Safety Precautions
When it comes to attempting handstands, safety should always be a top priority. Before you kick up into the inversion, ensure that you are in a space with ample room around you. This will prevent any collisions or obstacles hindering your practice.
Using a soft surface like a yoga mat or gymnastics mat can make a significant difference in cushioning your falls. Remember, falling is part of the learning process, so having that extra padding beneath you can offer peace of mind as you work on perfecting your handstand technique.
Listening to your body is crucial during handstand practice. If you start feeling fatigued or notice any discomfort, take a break. Pushing yourself past your limits can lead to injury and setbacks in your progress.
By prioritizing safety precautions such as practicing in an open area, using supportive mats, and being attuned to your body’s signals, you set yourself up for success in mastering the art of handstands without compromising on well-being.
Patience and Persistence
Mastering the art of handstands requires a combination of patience and persistence. It’s essential to understand that progress takes time, and setbacks are part of the learning process. Embrace each fall as an opportunity to learn and grow stronger.
Stay committed to your practice, even when it feels challenging. Consistency is key to building the strength and balance needed for a successful handstand. Celebrate small victories along the way, whether it’s holding the position for an extra second or improving your kick-up technique.

Remember that every journey has its ups and downs, but staying dedicated to your goal will yield results over time. Enjoy the process of learning something new and appreciate how far you’ve come since starting your handstand practice.
Keep pushing yourself out of your comfort zone, knowing that with determination and perseverance, you’ll eventually achieve your goal of mastering the handstand.
The benefits of Hand Stand
Have you ever thought about the benefits of mastering a handstand? Well, besides being a cool party trick or Instagram-worthy pose, handstands offer numerous advantages for both your physical and mental well-being.
Handstands are excellent for building upper body strength. By supporting your entire body weight on your hands, you engage muscles in your arms, shoulders, and core like never before. This leads to toned muscles and increased overall strength.
Practicing handstands can improve balance and coordination. Balancing upside down challenges your proprioception – the body’s sense of where it is in space – helping you develop better spatial awareness and stability.
Furthermore, inversions like handstands are known to boost circulation and lymphatic flow. The change in perspective encourages blood flow to the brain while also aiding in detoxification by stimulating lymphatic drainage.
Let’s not forget the mental benefits of conquering a handstand. It requires focus, determination, and overcoming fear – all skills that can translate into other areas of life beyond just acrobatics.
Common handstand mistakes to avoid
One common mistake when attempting a handstand is arching your back too much. This can lead to instability and make it harder to find your balance. Remember to engage your core muscles and keep your body in a straight line.
Another mistake is forgetting about proper hand placement. Make sure your hands are shoulder-width apart, fingers spread wide, and pressing firmly into the ground. This will give you a solid base of support for the handstand.

Avoid kicking up too forcefully, as this can cause you to overshoot or lose control. Focus on a controlled kick-up motion that allows you to find balance gradually.
Don’t forget about the importance of alignment – stacking shoulders, hips, and ankles vertically is crucial for stability in a handstand position. Keep practicing to improve your alignment over time.
Rushing the process and skipping foundational drills can hinder your progress. Take the time to build strength, balance, and confidence before attempting more advanced variations of the handstand pose.
Conclusion
Mastering the art of handstands requires dedication, patience, and consistent practice. By following the steps outlined in this guide, from warming up properly to practicing balance and alignment techniques, you can work towards achieving a solid handstand. Remember to prioritize safety, listen to your body, and celebrate each small improvement along the way.
Embrace the journey of learning how to do a handstand – it’s not just about physical strength but also about mental focus and resilience. With time and persistence, you can defy gravity with confidence and grace. So keep practicing, stay positive, and enjoy the process of mastering this impressive skill!
FAQs on HandStand
Can everyone learn handstand?
Yes, with dedication, practice, and proper guidance, most people can learn how to do a handstand. While some individuals may find it easier than others due to factors like strength, flexibility, and body awareness, everyone has the potential to develop the skills necessary to perform a handstand.
Is it easy to do a handstand?
For many people, learning how to do a handstand can be challenging initially. It requires strength, balance, coordination, and technique, which may take time to develop. However, with consistent practice, proper progression, and patience, many individuals can improve their handstand skills over time.
How long will it take to learn a handstand?
The time it takes to learn a handstand varies depending on individual factors such as fitness level, prior experience with gymnastics or yoga, and the amount of time dedicated to practice. Some people may learn to do a handstand within a few weeks or months of consistent practice, while others may take longer. It’s important to focus on gradual progress, celebrate small achievements, and stay committed to the learning process rather than fixating on a specific timeline. With perseverance and persistence, progress will come.
Related Articles: