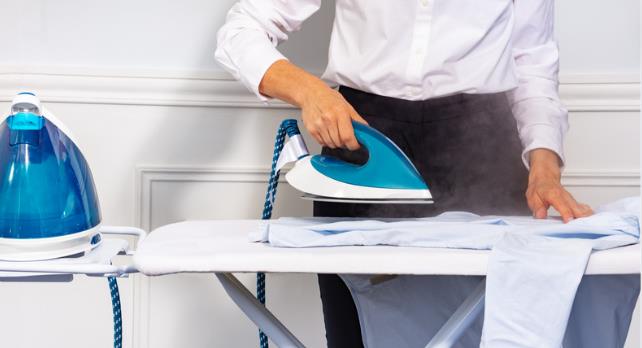
A well-ironed dress shirt is more than just a piece of clothing; it’s a statement of professionalism and attention to detail that can significantly influence first impressions. In both business and social settings, a crisply ironed shirt speaks volumes about your personal discipline and respect for the occasion. Whether you’re attending a job interview, a formal event, or even a casual meeting, the sharpness of your attire can enhance your confidence and how others perceive you.
We’ll walk through the essential tools and techniques needed to achieve that flawless look every time you iron your dress shirt, ensuring you step out in style and sophistication. Let’s see how to iron a dress shirt.
What You Will Need?

Before you begin ironing your dress shirt, it’s crucial to gather all the necessary tools and materials to ensure a smooth and efficient ironing process.
Here’s what you’ll need:
- Iron: A good quality steam iron is essential. Look for one with adjustable heat settings that can accommodate various fabric types.
- Ironing Board: An ironing board with a smooth, padded surface provides an ideal platform for ironing shirts. Ensure it’s stable and at a comfortable height to avoid straining your back.
- Distilled Water: If your iron has a steam function, use distilled water to fill it. This helps prevent mineral build-up inside the iron that could stain fabrics.
- Spray Bottle: A spray bottle can be filled with distilled water to mist the shirt lightly. This helps to soften stubborn wrinkles and make the ironing process easier.
- Starch: Optional but useful for achieving a crisper look. Starch adds stiffness to the fabric, making the shirt look sharp throughout the day.
- Pressing Cloth: A pressing cloth, such as a thin cotton tea towel, is crucial for protecting the shirt from direct heat, especially useful for dark or delicate fabrics that might shine or burn.
- Hanger: Have a hanger nearby to hang your shirt immediately after ironing to prevent new wrinkles from forming.
Gathering these items before you start ironing will streamline the process and help you achieve professional results at home. Next, we will discuss how to set up your ironing station to begin ironing your dress shirt effectively.
Preparation: Setting Up Your Ironing Station

Setting up an efficient ironing station is crucial for achieving the best results without unnecessary hassle or time wastage.
Here’s how to prepare your ironing station for a seamless dress shirt ironing experience:
- Select the Right Location: Choose a well-lit area with ample space around your ironing board to move freely. Adequate lighting is essential to spot and address all the wrinkles and folds properly. Ensure the area is free from distractions and safe from potential hazards, especially if you’re using a steam iron.
- Set Up Your Ironing Board: Position your ironing board at a height that is comfortable for you to stand and iron without bending over. This helps maintain good posture and reduces physical strain. Make sure the board is stable, and the cover is smooth without any creases, as bumps can transfer to the shirt fabric.
- Heat the Iron: Plug in your iron and set it to the appropriate heat setting according to the fabric of your dress shirt. Most irons will have fabric settings clearly marked. Allow the iron to fully heat up to ensure it’s ready to produce consistent steam and heat for effective ironing.
- Fill the Steam Iron: If your iron uses steam, fill the reservoir with distilled water. This will help in generating enough steam to smooth out wrinkles and provide a crisp finish. Check that there are no leaks and that the iron is functioning properly.
- Organize Your Accessories: Have all your ironing accessories, such as the spray bottle, starch, and pressing cloth, conveniently placed within reach. This organization prevents interruptions and maintains the flow of your ironing process.
- Prepare a Space for Finished Shirts: Arrange a space close to your ironing board where you can immediately hang the ironed shirts. Using hangers to hang shirts right after ironing helps keep them wrinkle-free until you’re ready to wear them or put them away.
How to Iron a Dress Shirt? – A Step-by-Step Guide
Ironing a dress shirt properly is a skill that enhances its appearance and your overall look. Follow this detailed step-by-step guide to ensure your dress shirt is ironed to perfection:
1. Iron the Collar
- Start by opening the collar and laying it flat on the ironing board.
- Iron the underside of the collar first, moving from the center outwards to the points.
- Flip the collar over and repeat on the outer side, ensuring you don’t create any new wrinkles.
- Once both sides are smooth, fold the collar back to its usual position and give it a final press to set the fold.
2. Iron the Shoulders
- Position one shoulder at a time on the narrow end of the ironing board.
- Smooth the fabric with your hands and gently press the iron over the yoke (the area just below the collar at the back).
- Move the shirt around the board as needed to iron the other shoulder.
3. Iron the Cuffs and Sleeves
- Lay one sleeve flat on the board, starting with the cuff. Unbutton the cuff and lay it open.
- Iron the inside of the cuff, then the outside, being careful around the buttons.
- Move to the arm of the sleeve, ironing from the top where the sleeve is sewn onto the shirt, down to the cuff. Make sure to align the seams of the sleeve to avoid creases.
- Repeat for the other sleeve, ensuring both are wrinkle-free and have a crisp edge.
4. Iron the Front of the Shirt
- Begin with the side that has buttons. Carefully iron around the buttons, not over them, to prevent damage.
- Smooth out the fabric and iron the area, moving from the top downwards.
- Switch to the other front panel (the one with buttonholes) and repeat the process, ensuring the fabric is flat and smooth as you go.
5. Iron the Back
- Lay the back of the shirt flat against the board.
- Start at the top and work your way down, repositioning the shirt as necessary to access the entire back.
- Make sure the pleats (if any) are aligned and ironed flat.
6. Final Touches
- Review the shirt for any missed spots or slight wrinkles.
- Use the iron’s steam function for a final once-over to ensure a polished look.
- Hang the shirt immediately on a hanger to preserve your ironing work.
Advanced Tips for a Professional Finish

Achieving a professional finish when ironing a dress shirt isn’t just about removing wrinkles; it’s about adding those extra touches that elevate the look. Here are some advanced tips to help you iron like a pro:
1. Use Starch for Extra Crispness
For an extra crisp finish, lightly spray starch on the collar, cuffs, and placket of the shirt before ironing. Starch adds stiffness and helps the fabric hold its shape throughout the day. Be cautious not to overuse starch, as it can make the fabric feel too stiff and uncomfortable.
2. Press, Don’t Slide
Instead of sliding the iron back and forth, press down firmly and lift the iron to move to the next area. This technique prevents the fabric from stretching and helps maintain the original fit and structure of the shirt.
3. Iron in Sections
Tackle the shirt in sections, and take your time with each part. Ensure each section is perfectly smooth before moving on. This methodical approach prevents the need for re-ironing areas you’ve already passed.
4. Use a Pressing Cloth
For delicate fabrics or shirts with a sheen, use a pressing cloth between the iron and the shirt. This protects the fabric from direct heat and prevents shiny marks or scorching. A thin cotton cloth or a special non-stick ironing cloth works well.
5. Control the Steam
Utilize the steam function for tough wrinkles and to get a sharp finish. However, be careful with fabrics that are prone to watermarks. In such cases, use a dry iron and rely on a spray bottle to lightly mist the fabric instead of using the iron’s steam.
6. Check the Details
Pay close attention to the details. Ensure the spaces between buttons are smooth and that the placket (the strip where the buttons and buttonholes are located) is straight and crisp. These are small areas that make a big difference in the overall appearance of the shirt.
7. Hang Immediately
As soon as you finish ironing, hang the shirt on a sturdy wooden hanger to cool down. This prevents new wrinkles from forming and helps the fabric set in its crisp, clean shape.
By incorporating these advanced techniques into your ironing routine, you can ensure that your dress shirts always look professionally cared for, boosting your confidence and appearance. Whether for daily wear or special occasions, a well-ironed shirt is a style statement that reflects meticulous care and attention to detail.
Common Ironing Mistakes and How to Avoid Them

Ironing can seem straightforward, but a few common mistakes can undermine your efforts to achieve that professionally pressed look. Being aware of these pitfalls and knowing how to avoid them can enhance your ironing technique and the overall appearance of your dress shirts:
1. Ironing Wrinkled Shirts
Ironing a shirt that hasn’t been properly smoothed or hung can set in existing wrinkles. Always make sure your shirt is slightly damp, or use a spray bottle to mist it before ironing. This moisture helps relax the fibers, allowing you to effectively smooth out all wrinkles.
2. Using Incorrect Temperature Settings
One of the quickest ways to ruin a shirt is to iron with a heat setting that’s too high for the fabric. Always check the label on your shirt for the recommended ironing temperature and adjust your iron accordingly. Cotton and linen can handle high heat, but synthetic fabrics like polyester need a lower heat setting to prevent melting or scorching.
3. Ironing Over Buttons and Zippers
Applying direct heat to buttons and zippers can cause them to melt or get damaged. Always iron around these accessories, not over them. You can use the tip of the iron to carefully press the areas around the buttons and use a pressing cloth if necessary.
4. Dragging the Iron
Moving the iron back and forth over the fabric can stretch and misshape the shirt. Instead, use the lift-and-press method: press the iron down, lift it up, and move to the next area. This technique provides even heat distribution and minimizes the risk of stretching the fabric.
5. Skipping the Collar, Cuffs, and Placket
These areas are crucial for the shirt’s overall appearance. Always start with the collar and cuffs, as these need to be crisp to give your shirt a sharp look. Make sure to iron both inside and out of these parts. For the placket, ensure it is straight and well-pressed to maintain the structure of the shirt.
6. Leaving the Shirt on the Ironing Board
Once ironed, leaving the shirt on the ironing board can cause new wrinkles to form. Hang your shirt immediately on a wooden hanger to ensure it dries in the right shape and stays wrinkle-free.
7. Not Cleaning the Iron
Over time, your iron can accumulate dust and other residues, which can transfer onto your shirt. Regularly clean the soleplate of your iron and ensure there are no deposits in the steam holes. You can clean the soleplate with a damp cloth when it is slightly warm and use a cotton swab for the holes.
FAQs on Ironing Shirt
Can you iron a dress shirt?
Yes, you can iron a dress shirt to remove wrinkles and creases, giving it a smooth and crisp appearance.
How hot should an iron be for a dress shirt?
The recommended iron temperature for a dress shirt varies depending on the fabric. For most cotton dress shirts, a medium to high heat setting (around 300-400°F or 150-200°C) is suitable. However, always check the care label on the shirt for specific instructions.
Is it better to iron or steam dress shirts?
Both ironing and steaming can be effective methods for removing wrinkles from dress shirts. Ironing provides a crisp finish, while steaming is gentler and can be quicker. The choice between the two depends on personal preference and the fabric of the shirt.
Should you iron a dress shirt inside out?
It is not necessary to iron a dress shirt inside out. Ironing the shirt with the outside facing up is more common and allows for better control over the ironing process to avoid damaging the fabric.